02 November 2010
Fitting with Leigh
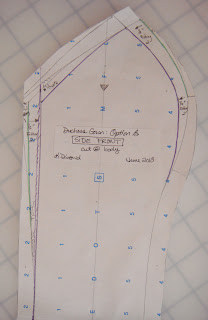
I had a lot of left over denim that I used for the latest muslin (or toile) for the Duchess Gown. The denim was a closer match in fabric weight to the silk satin than the cotton muslin was.
Overall changes:
- Shorten the waist length another 1/2" (on all panels)
- Take side seam in 1/2" at top seam, tapering to zero at waistline (on Side Front and Side Back panels)
- Take side front seam in 1/2" at top seam, 1/4" at apex, tapering to zero at bust cup bottom (on Side Front and Center Front panels)
Labels:
couture techniques,
gown construction,
petticoat
Progressing is being made (I promise!)
So my sewing machine that I love, decided it needed a short hiatus before getting to work on my gowns. The needle assembly broke and was down for about 2 weeks after our last committee meeting. All is fixed now and it is running better than ever.
Progress has been slow. With the metal embroidery, on the bodice, there is very little room for alterations after the embroidery is on the gown. I had my latest fitting with Leigh last Friday. Unfortunately, I was not as aggressive as I needed to be in the previous pattern corrections, so the petticoat bodice that I had almost finished before the fitting is not usable. I have already made the appropriate pattern corrections to the pattern for the petticoat bodice and the gown bodice. Yesterday I started cutting and sewing actual fabric, so hopefully progress will start picking up.
19 September 2010
More Samples of Re-embroidered Alençon Lace
Top Sample: 3mm Light Cream Rose Swarovski Pearls, 5mm Cream Swarovski Pearls, 2.5mm Crystal Swarovski Bicone Crystal, 3mm Champagne Swarovski Bicone Crystal, Gilt Bright Check size 6, Gilt Buttercup Aiko Japanese beads size 11, Jade Rice beads, Silver Bright Check size 6, Copper Bright Check size 6, 3mm Antique Rose Swarovski Bicone Crystal, 3mm Silk Swarovski Bicone Crystal, 3mm Champagne Light Peach Swarovski Bicone Crystal, and 3mm Light Peach Swarovski Bicone Crystal.
Bottom Sample: 3mm Cream Swarovski Pearls, Silver Bright Check size 6, Silver Lined Japanese Glass beads size 11, 3mm Erinite Swarovski Bicone Crystal, 3mm Pacific Opal Swarovski Bicone Crystal, 3mm Mint Alabaster Swarovski Bicone Crystal, and 4mm Erinite Swarovski Bicone Crystal.


Bottom Sample: 3mm Cream Swarovski Pearls, Silver Bright Check size 6, Silver Lined Japanese Glass beads size 11, 3mm Erinite Swarovski Bicone Crystal, 3mm Pacific Opal Swarovski Bicone Crystal, 3mm Mint Alabaster Swarovski Bicone Crystal, and 4mm Erinite Swarovski Bicone Crystal.
18 September 2010
Re-embroidered Alençon Lace finished
I wanted to add a charcoal colored glass bead because I thought the blues and greens of my dye samples were too sweet. Unfortunately, when I added the graphite glass beads that I had they ended up looking black. I am going to put this on a hair comb and photo it in someone's hair to see how the beads look on a curve and in different lights.


15 September 2010
07 September 2010
Tea Dying Alençon Lace
I felt the Alençon lace was too white, so I wanted to try tea staining some of the lace for my next samples for the embroideries for Dress #2. I thought the bright white would be too much of a contrast for the pastel colors I have been using. I varied the depth of the tea staining on different pieces with the lightest being a antique white color and the darkest being a nude color.


06 September 2010
Subscribe to:
Posts (Atom)